Account Hooks
Introduction
Account Hooks are a way to add further customization to your Neosync account.
Neosync Version Availability
Account Hooks are available for all accounts in Neosync Cloud.
For OSS users, Account Hooks are only available with a valid Enterprise license.
How to configure Account Hooks
This section will cover how to configure hooks in the Neosync UI. They can also be configured via the API and soon the Terraform provider.
Getting there
Account Hooks can be via the settings page for your account.
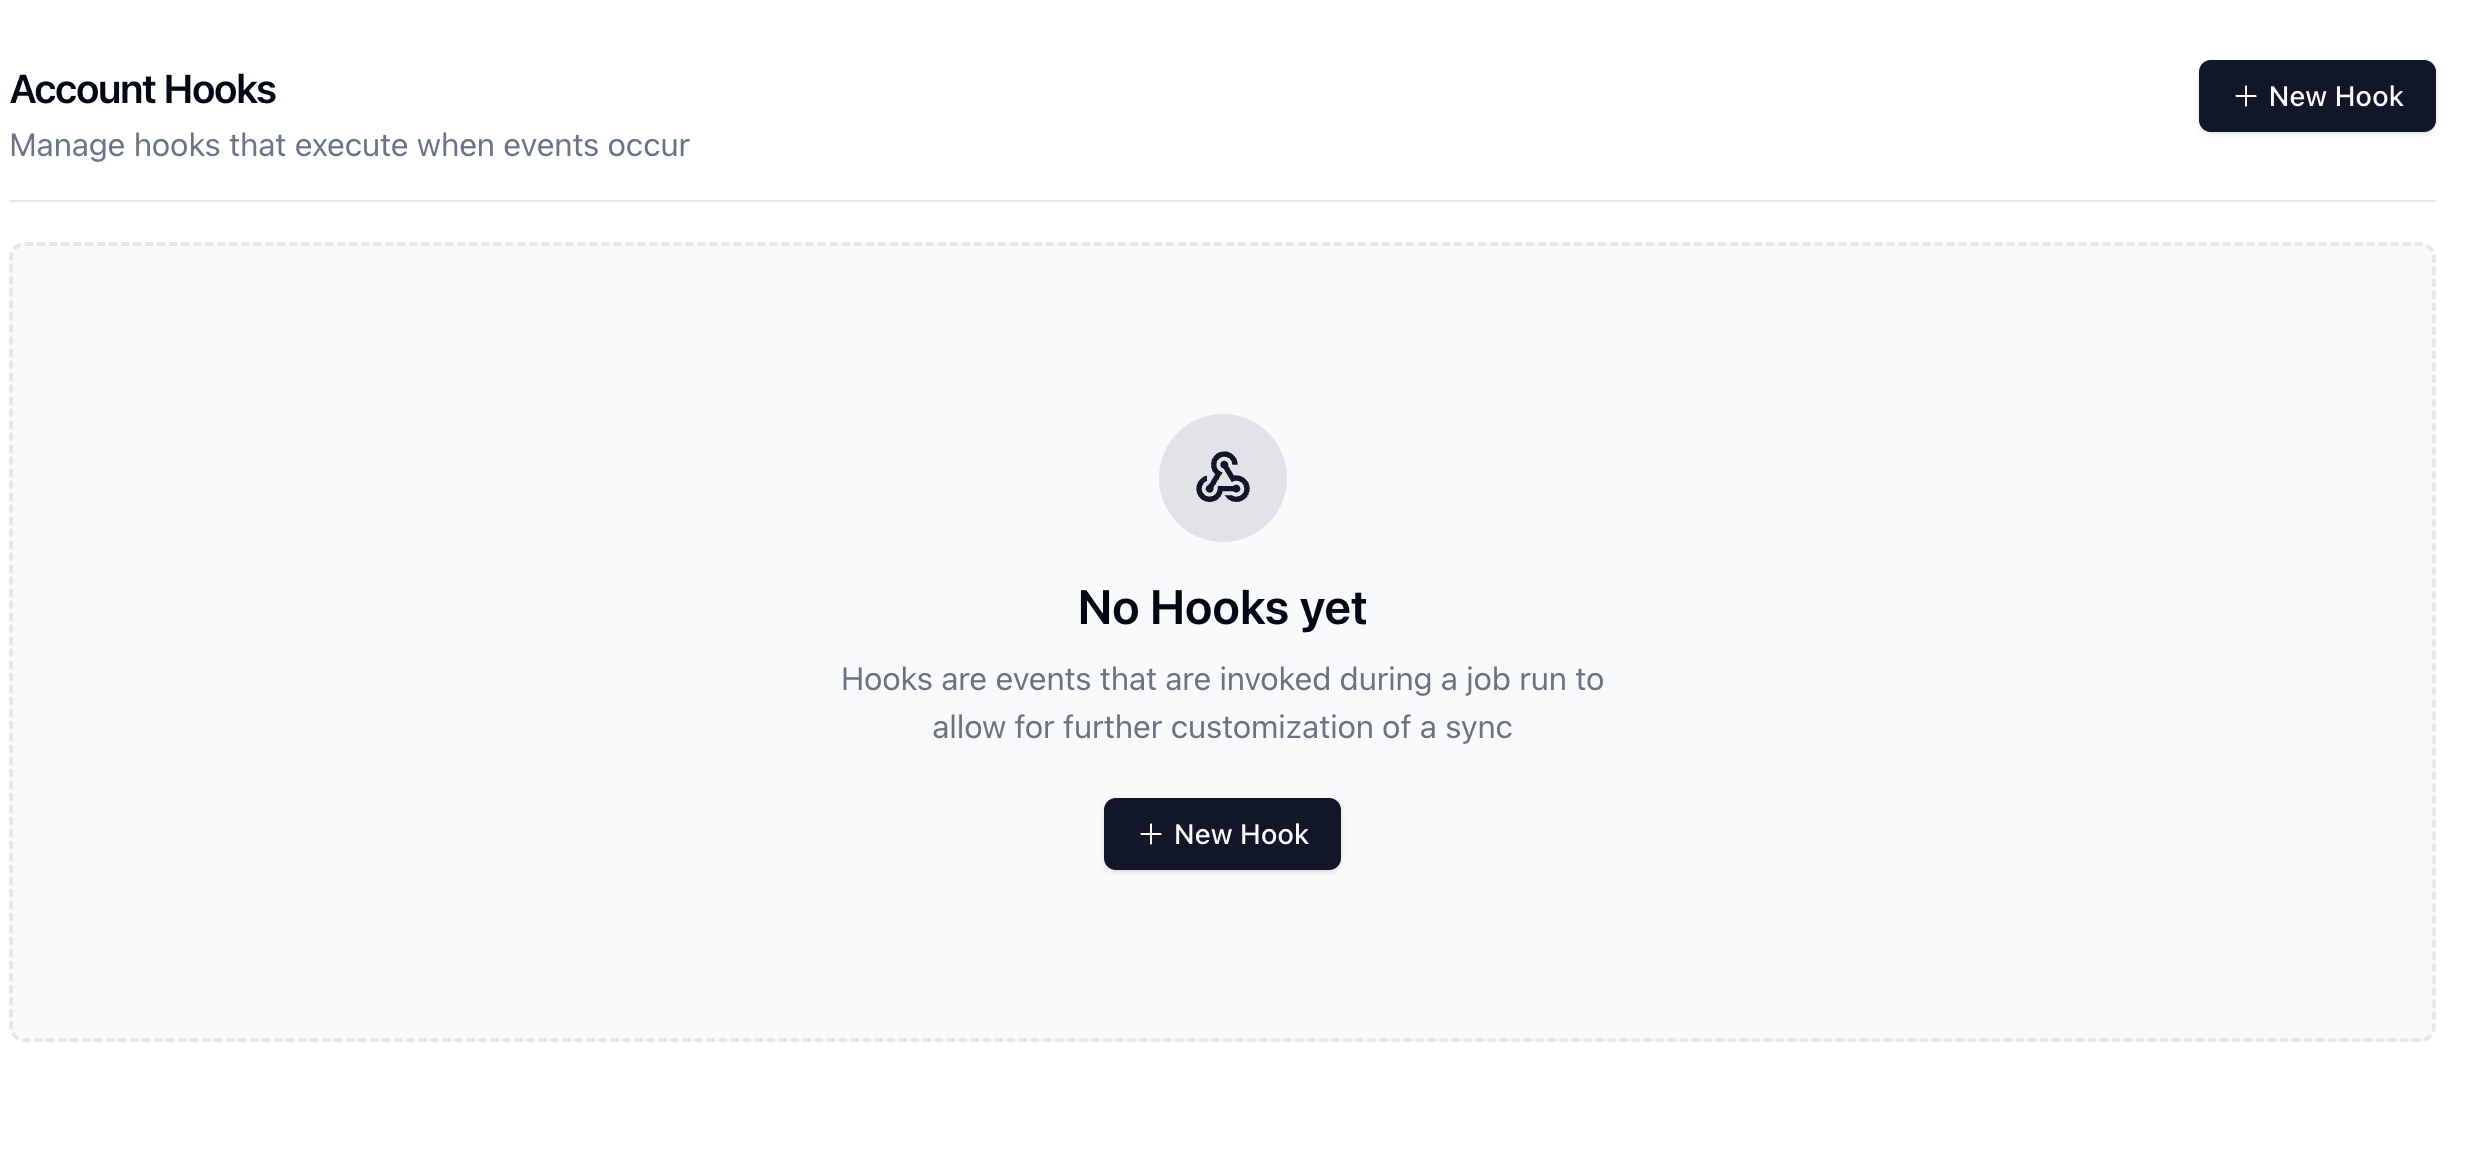
Creating a new hook
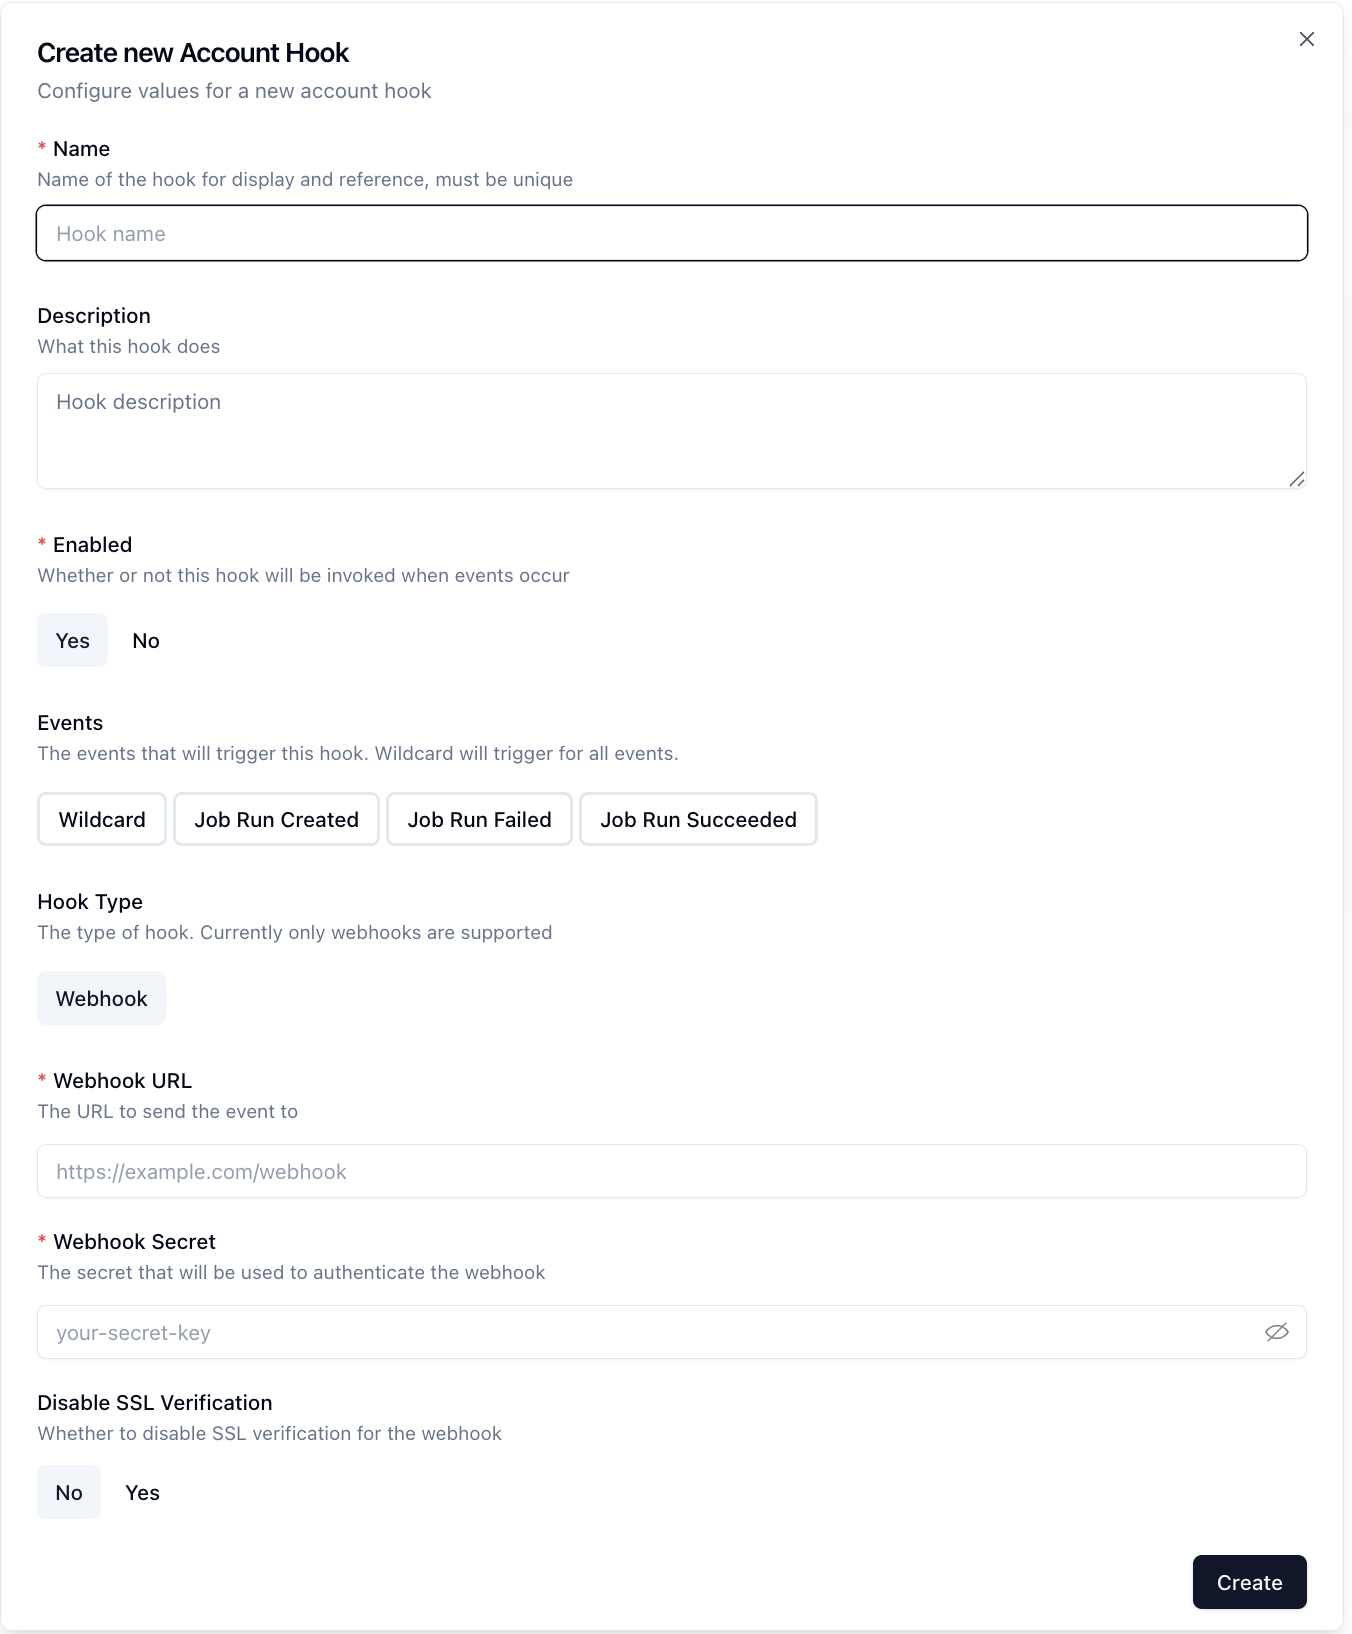
From here a new hook may be created. Click on the new hook button and you'll be presented with a new hook form to fill out.
There are a few different configuration options available to you to further fine tune when the hook runs.
Today, Webhook and Slack hooks are supported, with plans for, Discord, and other integrations in the future.
Execution order strategy
When an event is emitted, Neosync retrieves all active hooks for the event and executes each hook in order of creation. Today they are executed in synchronous fashion, meaning that each hook is executed one at a time. This may change in the future to allow for parallel execution of hooks.
Enabling/Disabling Hooks
Hooks can be easily enabled or disabled by clicking the toggle button in the hook creation or edit form.
This is useful if you want to temporarily disable a hook without having to delete it.
Events
Today, there are 3 events that can trigger a hook:
Job Run CreatedJob Run FailedJob Run Succeeded
Each event follows the same format, with the only difference being the payload.
{
  "name": "1", // The enum value of the event name
  "accountId": "<account-id>", // The account ID the event occurred in
  "timestamp": "<timestamp>", // The timestamp the event occurred in UTC time.

  // The payload for the event. The presence of the key depends on which event occurred.
  "jobRunCreated": {},
  "jobRunSucceeded": {},
  "jobRunFailed": {},
}
Job Run Created
The payload for the Job Run Created event is the following:
{
  "jobId": "<job-id>",
  "jobRunId": "<job-run-id>"
}
Job Run Failed
The payload for the Job Run Failed event is the following:
{
  "jobId": "<job-id>",
  "jobRunId": "<job-run-id>"
}
Job Run Succeeded
The payload for the Job Run Succeeded event is the following:
{
  "jobId": "<job-id>",
  "jobRunId": "<job-run-id>"
}
Webhooks
Webhooks are bare bones web requests that give you full control over what to do with the messages. The possibilities are endless!
Webhook Authentication
Webhooks are authenticated using a HMAC hash of the payload and a secret key.
The secret key is set when the webhook is created and is used to verify that the webhook is coming from Neosync.
The HMAC hash is generated using the SHA256 algorithm and the secret key.
The HMAC hash is sent in the X-Neosync-Signature header.
The HMAC hash algorithm is sent in the X-Neosync-Signature-Type header.
More Request Details and Response Information
Each webhook is sent as a POST request to the webhook URL.
The timeout for webhooks is 10 seconds.
If the webhook does not respond within 10 seconds, it is considered to have failed.
The webhook is considered to have failed if the response status code is not in the 200-299 range.
The webhook request body is sent as JSON and the content type is application/json.
Example Verification in Go
package main

import (
	"crypto/hmac"
	"crypto/sha256"
	"encoding/hex"
	"fmt"
	"io"
	"net/http"
)

const SECRET = "your-secret-key"
const WEBHOOK_SIG_HEADER = "X-Neosync-Signature"

func main() {
	mux := http.NewServeMux()
	mux.HandleFunc("/webhook", func(w http.ResponseWriter, r *http.Request) {
		receivedSignature := r.Header.Get(WEBHOOK_SIG_HEADER)
		payload, err := io.ReadAll(r.Body)
		if err != nil {
			w.WriteHeader(http.StatusInternalServerError)
			return
		}

		verified, err := verifyHmac(SECRET, payload, receivedSignature)
		if err != nil {
			w.WriteHeader(http.StatusUnauthorized)
			return
		}

		if !verified {
			w.WriteHeader(http.StatusUnauthorized)
			return
		}

		// do something with the payload
		w.WriteHeader(http.StatusOK)
	})

	http.ListenAndServe(":8080", mux)
}

func verifyHmac(secret string, payload []byte, signature string) (bool, error) {
	mac := hmac.New(sha256.New, []byte(secret))
	_, err := mac.Write(payload)
	if err != nil {
		return false, fmt.Errorf("unable to write payload to hmac: %w", err)
	}
	expectedMAC := mac.Sum(nil)
	expectedSignature := hex.EncodeToString(expectedMAC)
	return hmac.Equal([]byte(signature), []byte(expectedSignature)), nil
}
Slack
The Slack configuration offers a first-party way of receiving notifications.
Today the messages are fully controlled by Neosync and cannot be altered.
Configuring the Slack hook requires using Oauth to install the Neosync Slack App into your Slack's workspace.
The hook configuration itself asks for the Channel Id that will be used to send the notifications for your specific hook configuration.
When creating the hook, the Slack app will attempt to automatically join the channel, provided it is public.
For private slack channels, the Neosync app will have to be manually invited to it, as Slack does not provide a way to automatically do this.
Setting up OAuth
When in the slack hook form for the first time, you'll see a notice that says Slack is not connected.
There are two buttons, Verify and Connect. Click the Connect button first. This will open a pop-up window that will
take you through the Slack oauth flow of installing the Neosync app to your workspace. If all goes well, you'll land back on the Neosync page with a success and can simply close the window. If an error occurred, that will surface on the page as well.
After closing the window, the hook form may still show that it is not connected. Click the Verify button to initiate a request to re-check that Neosync is now connected to your Slack. If so, you'll see a message like Slack is connected to <team>. You should only ever have to do this once, but if something needs to change, you can now click on the Re-connect button to go through the oauth flow a second time.
You may now enter your channel id and submit the form!
Finding your Slack Channel Id.
In slack, go to your channel. Click the name of your channel at the top of the app. This will open a channel info dialog. At the bottom if this dialog you will find your channel's id. Copy that and paste it into the slack configuration.
Retries
If any account hook fails, it will be retried up to 3 times.
The backoff coefficient is 2.0, with an initial interval of 1 second.
The maximum interval is 100x the initial interval.
The retry policy is applied per hook execution.